Their are some You Tube video's of my completed cabinet build to co-incide with this article, which you may find by clicking the links below which will redirect you to YouTube. I haven't embedded these links directly into the page, since some browsers give warning messages when embedded objects into a page, i.e Windows Internet Explorer tends to give AciveX warnings.
Each section of the video features my own running commentary
Part 1 - This gives a guided tour of my arcade machine, and what materials and computer hardware were used. Many of those old enough to remember,
probably recall the smell of the sea air, fish and chips, and
visiting your local arcade amusement arcade during the early
1980's. It was a great way to waste ones youth, and checking out
the competition, to see who could get the highest scores on the
highscore tables, of games such as Pacman, or Space Invaders, and
those people who wrote obsenities into the high score
table...
Sadly, those days are long gone. The birth of the computer console which now brings realistic gaming into the living room and advances in processing power in modern day computers mean those happy memories of playing Space Invaders down the local arcade amusements have long since gone. Most seaside amusements are now filled with fruit machines.
But what happens if you want to revisit those fond memories ?
Well, it was due to my love of retro computering why I still use Amiga's, but after constructing an Athlon based PC for emulation activities, I checked out how I could mimic the exact behavior of those old Arcade cabinets from yesteryear, in which case I discovered MAME. Mame is an emulator which mimics the exact behavior of all those old arcade machines from yesteryear.
MAME works by mimicing the original arcade cabinets video board hardware, and soundchips in software. The games themselves are actual dumps of the binary code from the original chips that were contained in the original arcade cabinets. These "dumps" are performed by reading the code off of the original EPROM chips using an EPROM reader and the binary is then transfered to a computer. At this stage, the maintainers of the MAME emulator project then attempt to get the binary to run under MAME via software emulation. This in effect means the games are not reproductions; they are the actual *real* games via copies of the EPROM chips / BIOS code dumped straight from the original cabinets !
Arcade machines originally housed a motherboard / daughterboard which just ran a single arcade game. Typically this consisted of a microprocessor or central processing unit (much like your modern day computer), a video board (that translated graphics into pictures), a sound board, and an input controller which was wired to the arcade cabinet controls (normally a joystick or steering wheel). Such original arcade machines certainly did not have a PC's fitted into them. They just did one single task: run one game.
A recent die hard arcade preservationist on the MAME forums commented to me it is somewhat lame to fit a PC into an arcade style cabinet. I have to strongly disagree. The MAME project ensures once these old arcade cabinets have died and been disposed of, at least the games themselves can still be enjoyed by future generations, since they are emulated in software. Building your own cabinet also brings you a step closer and makes for a much enjoyable experience, and allows you to replay the games how they were intended (with oversized control panel), and a "real" working coin slot !
The added advantage is a PC can emulate thousands of past arcade cabinets / consoles, something of which an old style 1980's arcade cabinet cannot do. My point is, who wants an authentic clumsy cabinet taking up valuable space, when a MAME cabinet is versatile and can run hundreds or even thousands of games. You can also have some fun spending your spare time on a new hobby, and you may just learn some valuable woodworking skills along the way. Furthermore, if you get stuck their are sites as BYOC (Build your own arcade cabinet) where you can meet other such souls who have already embarked on building their own machines, who are only to happy to help out.
I am not the best man to ask about woodworking. Their are plenty of good arcade cabinet plans out their via the internet which you can download and follow if your real eager to build your own arcade cabinet. My main aim here is just to give you a few pointers on materials and things to look out for during the construction processes and plenty of URL's where you can order things like materials, and construction plans. Being particular lazy, I surfed the internet to find some good constructions plans. The plans for my cabinet I downloaded from Mike Trello's page which is suitably titled 'arcade cab dot com'. You can find a complete construction guide via this website which is at http://www.arcadecab.com. Thanks to people like Mike who share their knowledge it is easy for just about anyone to build your own arcade cabinet.
Arcade cabinets were originally built from 3/14" plywood. This stuff seems fairly difficult to find these days, although some 18mm wood is the nearest you are likely to find. Check your favourite wood supplier for prices. Obviously, getting an 8x4 foot sheet of wood home is a problem. I used a timber merchant who delivered.
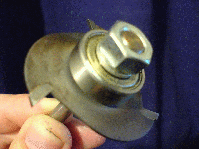 All arcade cabinets had a plastic strip
around the edging of the cabinet. This is known as T-molding. If
you build your cabinet from 3/14" ply or 18mm ply, you are going to
need some 11/16 T-Molding. The process of fitting the T-Molding to
the edges of your cabinet involves the use of an electric router
with a 1/16 slot cutting bit and arbour attached to create a
channel for the T-Molding to fit into. Upon completion of the
routing of the edges of the cabinet, the barb of the T-molding can
be hammered into place with a rubber mallet to fit the bard into
the slot.
I recommend for sourcing your find T-Molding and the slot cutting bit to order from http://www.t-molding.com. Last time I looked, the guy had problems with overseas credit card processing through his page, so if he still hasn't fixed this problem, you will need to order your T-molding and router bit through Paypal. Although it can take upto seven days for bank transfer when ordering through PayPal if you wish to order from him this way.
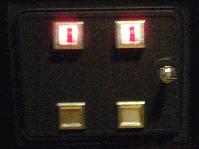 |
Obviously, if you want to add a working coin slot, you will need to source a coin mech. Their are two different types of coin mech. Firstly, their is the basic coin slot mechanism which accepts 10 pence pieces or a 25 cent coin. More advanced coin mechs used a control unit known as a "sentinel" which was a processor board which allowed the arcade attendent / engineer to be able to give you say 10 credits if a £1 or 1$ coin is inserted, by setting dipswitches on the controller board. As you can see from the left most picture, the coin mech I choose to incorporate into my cabinet is somewhat similar to that used on the Atari asteroids cabinet. |
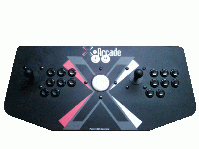 |
You can purchase the lovely X-Arcade controller from http://www.x-arcade.com. I most certainly recommend the X-Arcade tankstick. It is a beautiful controller, which you can incorporate into your cabinet, which connects to a spare USB port on your PC. If you live in the UK, you may save youself money on postage by purchasing the X-Arcade controller from Gremlins Solutions, who are based in Lancashire, in the UK. Their web address is: http://www.gremlinsolutions.com who will be happy to take your order. I was pretty annoyed; I ordered my X-Arcade from the states, and it cost me around £40 in shipping costs. Shortly after, a UK distributor now stocks them, if only I had known. Doh ! |
 |
Marquee retainers were used on all old arcade machines to hold the illuminated piece of plexi glass at the top of the cabinet which displayed the particular arcade machines marquee. If you live in the US, you can order them from http://www.happcontrols.com. If you live in the UK, you may like to ask Andy at Gremlin Solutions if he can get some for you, Gremlin Solutions web page is at http://www.gremlinsolutions.com. Alternatively, he also trades through e-bay as an e-shop. |
Happ Controls have been supplying spare parts for arcade machines for over 25 years. So if you cannot find that particular component you need to complete your cabinet build then try http://wwww.happcontrols.com.
I must say I got all the bits for my arcade cabinet fairly easily, with the exception of the T-Molding, and the 11/16 Slot cutting bit. Those I ordered from our yankie friends across the ocean in the United States.
Here are my cabinet pictures of each stage of the construction. My apologies for the somewhat poor picture quality, they were snapped on a 2 megapixel camera phone.
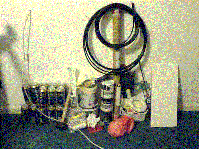
Build day and my materials. Paint, rollers, t-molding and marquee retainers, mastic gun, woodfiller, and lots of other bits and pieces. Beer as seen in the photo is optional. |
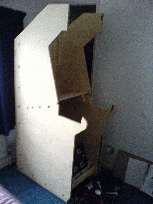 Day one and time
for my colleague and I to get along with the construction. My
cabinet I built from 18mm birch ply. This was beautiful wood, and
needed minimal sanding, because it was cabinet grade stuff. In this
photo, you will see the main sides and base were attached as was
the monitor shelf Day one and time
for my colleague and I to get along with the construction. My
cabinet I built from 18mm birch ply. This was beautiful wood, and
needed minimal sanding, because it was cabinet grade stuff. In this
photo, you will see the main sides and base were attached as was
the monitor shelf
The most critical parts at this stage were ensuring the monitor shelf is at the correct angle and height. A good tip here is before you join the two sides is to lay both sides of the cabinet sides on floor, scribe a pencil line on the front side of the bezel surrounding your monitor screen, and then do the same for the viewable area of the cabinet where the screen will be positioned. I then used a set square to make sure I had the monitor positioned perfectly and laid the monitor down flat to check everything was as I wanted, before screwing in the 2x4 battons for the monitor shelf. Do the same for the other side. Once you have your monitor shelf readily cut, it can be placed into position and both the base and shelf pieces screwed into position. It's a good idea to check with a set square from the inside of the cabinet that the outer walls and base are exactly at 90 degrees, so double check before putting the screws in (make sure they are all countersunk) so all screw heads can be hidden with a bit of wood filler. Countersinking the screws is fairly straight forward; just get yourself a tube of wood filler fitted into a mastick gun and squirt into the countersunk holes. I also filled some filler in some of the areas of the cabinet which has some minor imperfections. Wood filler typically takes around 2 hours to fully dry and generallly shrinks back once dried, so I found I had to go over a few areas again to make sure everything was patched well. Dust sheets were prepared in the computer room to protect all my precious pieces of kit before sanding. Any normal person would of built and sanded in a garage. That was not an option - lifting something of this weight up some stairs would be nye impossable. Alas, it was constructed, sanded and painted in an upstairs room of the house. Dust sheets were placed all over the room. For sanding, I used a block of wood with some sanding paper wrapped tacked to it with a couple of drawing pins: that made a good sanding block. The entire cabinet was sanded with 320 grade first of all, and then with a 120 gritt sanding paper. The birch ply is beautiful wood to work with, so usually this requires minimal sanding. Nonetheless, I gave the sides and base some attention with the sanding block, and also the 2x4's at the back of the cabinet. |
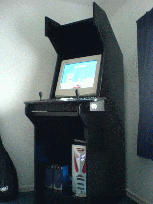 The most common
colour for arcade machines back in the 80's / 90's was black.
However, their were a few older cabinets dating back to 1978 that
used wood staining. This is a matter of personal taste. wood
staining would need more work because obviously minor imperfections
are going to show up more easily. Some people choose to paint their
cabinets, others use formica. As for my own choice, I choose black
paint. The most common
colour for arcade machines back in the 80's / 90's was black.
However, their were a few older cabinets dating back to 1978 that
used wood staining. This is a matter of personal taste. wood
staining would need more work because obviously minor imperfections
are going to show up more easily. Some people choose to paint their
cabinets, others use formica. As for my own choice, I choose black
paint.
I used the hose of an electric hover to suck off any dust from the sanding process. Then wiped the whole cabinet down with at least six lint free clothes. I didn't want dust in my paint job... I painted using standard wood paint. The cabinet was painted with two coats white primer. This was followed by a further two coats of grey undercoat (necessary to tone down the white primer which was underneath so it wouldn't show through), and finally one coat of gloss for a superior finish. The next day, under different light, I noticed one of the sides I could just slightly see some grey undercoat showing through the black slightly in the sunlight, so I applied a second coat of gloss to the sides. A little tip on applying paints: water based paints you should use wooly rollers, for oil based paint (undercoat and gloss), foam rollers should be used. Sixteen hours later and the gloss had dried. By the following day, I had a half finished arcade cabinet. At this stage, their was no speaker area, speaker grill, marquee, or hinged coin door and no coin mech fitted. It was however completed enough to load the components inside. I used the cabinet in this uncompleted state for a month or so, until I had the time, motivation and money to finish the build, at that time I decided it was time for a celebratory beer. |
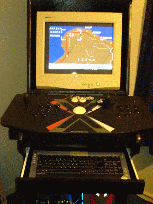 |
After using the arcade cabinet in this uncompleted state for a month or so (see above), it was driving me nuts of not being able to use the computer keyboard for tweaking Mame and my other emulators. My original plan was to fit a wireless keyboard solution outside of the cabinet and do away with the keyboard drawer to make things as authentic as possible. I decided against this in the end, generally because wireless keyboards are somewahat expensive, and I hate having a keyboard on my lap. The drawer was made out of some 18mm birch ply and some drawer runners from an old kitchen unit and was ideal for the job. The sliding keyboard drawer hides the keyboard from view when it is not required. |
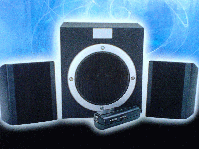 |
The next part of the build was to purchase a set of speakers. I choose a set of Neutac speakers which cost £15. They were ample and delivered a nice sound and bass. Their is nothing special about these set of speakers, their for use with a PC or gaming console. As you can see from the picture, the unit consists of a two satellite speakers, a bass box, and their is a wired control unit that allows easy adjustment of volume and bass. I decided to place the wired remote inside the pullout keyboard drawer. |
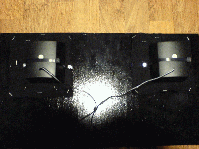 |
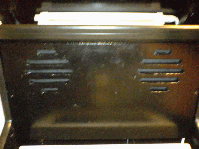
I had cut my speaker panel and the grills were cut on the jigsaw. I used an old black t-shirt which I cut into two squares. These were stapled over the grills and the satellite speakers were attached. I originally used velcro to attach the speakers to the grills, but found this wasn't very successful. I found cable ties did a better job, and these were screwed to the the back of the grills with some screws. This allowed me to secure the speakers firmly and they were secured so tightly their was no risk of them comming loose. The bass box I suitated inside the cabinet. |
 |
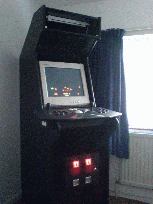
Speaker grills were screwed onto the wooden blocks, then the lower part of the marquee was fixed using chocolate box fixings (which are commonly used to assemble kitchen cabinets). This stage was quite fiddly, since the top and lower part of the marquee had to horizonal and exactly vertical. It was a case of holding the speaker grill in place then moving the bottom of the marquee about, checking it was level with a spirit level, and then securing the lower part of the marquee into position, and finally screwing the speaker grills into the wooden blocks. Finally, the fluroscent strip light for illuminating the marquee was fitted inside the top of the cabinet. |
 |
Finally the coin door was cut from some 18mm
birch ply. For the doors hinge, I used a 30 inch piano hinge I had
bought. It did a good job at securing the door. The coin mech was
then positioned into the hole, and the steel fingers screwed into
position from the inside of the door using the supplied nuts. It
was all very straight forward. The coin slot lamps were lit by
using an old computer power supply and soldering one black and one
yellow wire to a 12 volt computer power supply I removed from an
old PC.
At this stage, the cabinet was near completion, with just the monitor bezel, glass and marquee to order and fit. |
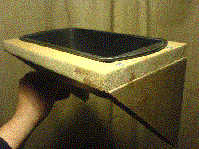 |
My coin mech did not come with a tray to collect coins. After reading up on Atari's first version of Pong that hit the arcades during the 1970's, they used a bread loaf tin to collect coinage. I liked this idea, and adopted this approach for my cabinet. A supporting shelf that the bread loaf tin would fit into was screwed into position under the coin drops of the coin mech so the coins would be collected in the bottom. A novel idea, and it worked well. To the left, you can see the design before it was painted and fitted to the inside of the coin door. |
 |
To get a credit in MAME, you press key 5 for
player 1, or key 6 for player 2. Their are many ways to wire up a
coin mech to a PC to accomplish this. The first is via a processor
board which is able to mimic keyboard input. The +, - and GND wires
are simply hooked up the the microswitch from the coin mech to the
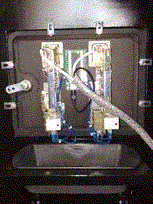
keyboard controller board, which is then inserted into the PC. The other cheaper method is to buy an X-Arcade controler, and hack it, by soldering the coin wires to the two credit buttons on the side of the joystick controls. This involves opening up the X-Arcade controller and doing a bit of hardware hacking. I attempted this method, but had little success. In the end, I bought an IPAC 2. This piece of hardware is a little circuit board that connects to your PC's USB port. It then allows you to connect up trackball, spinners, and joysticks from "real" arcade machines. I however, did not need the IPAC for this purpose, I only used it to attentuate credits when a 10 pence is inserted into my coin mech. I situated the tiny IPAC 2 board between the coin drops using some Velcro strips to fix the PCB into position, then soldered a spade crimp onto the three wires coming from the IPAC 2 interface which was then fitted onto the three microswitchs for each coin mechanism. NOTE: The left and rightmost solder tags of the microswitch I twisted the wires together and put them into the terminal block of the IPAC 2 which is marked "COIN 1". This middle microswitch tag of the microswitch I then put into the terminal block of the IPAC 2 which is labeled "GND". I repeated this for the second microswitch. Finally, the IPAC 2 interface was connected to the PC via the supplied USB cable to a vacant USB port on my computer. The final test was to ensure when a 10 pence was put into the slot, the IPAC was working. This was confirmed when I dropped a coin into the slot and loading Windows notepad, as a 5 appeared for slot 1 and a 6 appeared for slot 2. Finally, I bought up the menu for the DOS version of MAME, went to "other controls" menu, and mapped keys 5 and 6 for coin slots 1 and 2 respectively of my coin mech. This now meant players could now insert a 10 pence piece to obtain a credit. |
 |
My marquee I ordered from http://www.gremlinsolutions.com who did a fantastic job. I choose something which looked cool, and the MAME logo I particularly liked. |
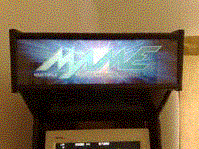 |
After placing the marquee between two pieces of plexi glass, the marquee was screwed into position using two marquee retaininers mounted at the top and bottom which were screwed into place. The rear piece of plexi glass I decided to leave the blue protective film on the back to help defuse the light so the marquee would be evenly lit. |
 |
Now the arcade machine had been finished, a way
of hiding the Windows XP environment was needed so the machine
would look like an arcade machine as apposed to just a PC stuffed
in a wooden cabinet. This is where MAMEWAH came into play.
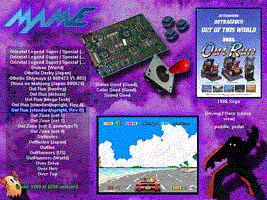
MAMEWAH is a front end for the Windows DOS version of MAME, but can also be used to launch other emulators too. It is completely skinable, meaning you can even design your own skins for it should you so wish. Selection of MAME games is either via joystick, trackball or cursor keys on a PC keyboard. It is highly configurable, but unlike other applications, needs to be configured using a text editor to point to your MAME roms directory and location of skins. |